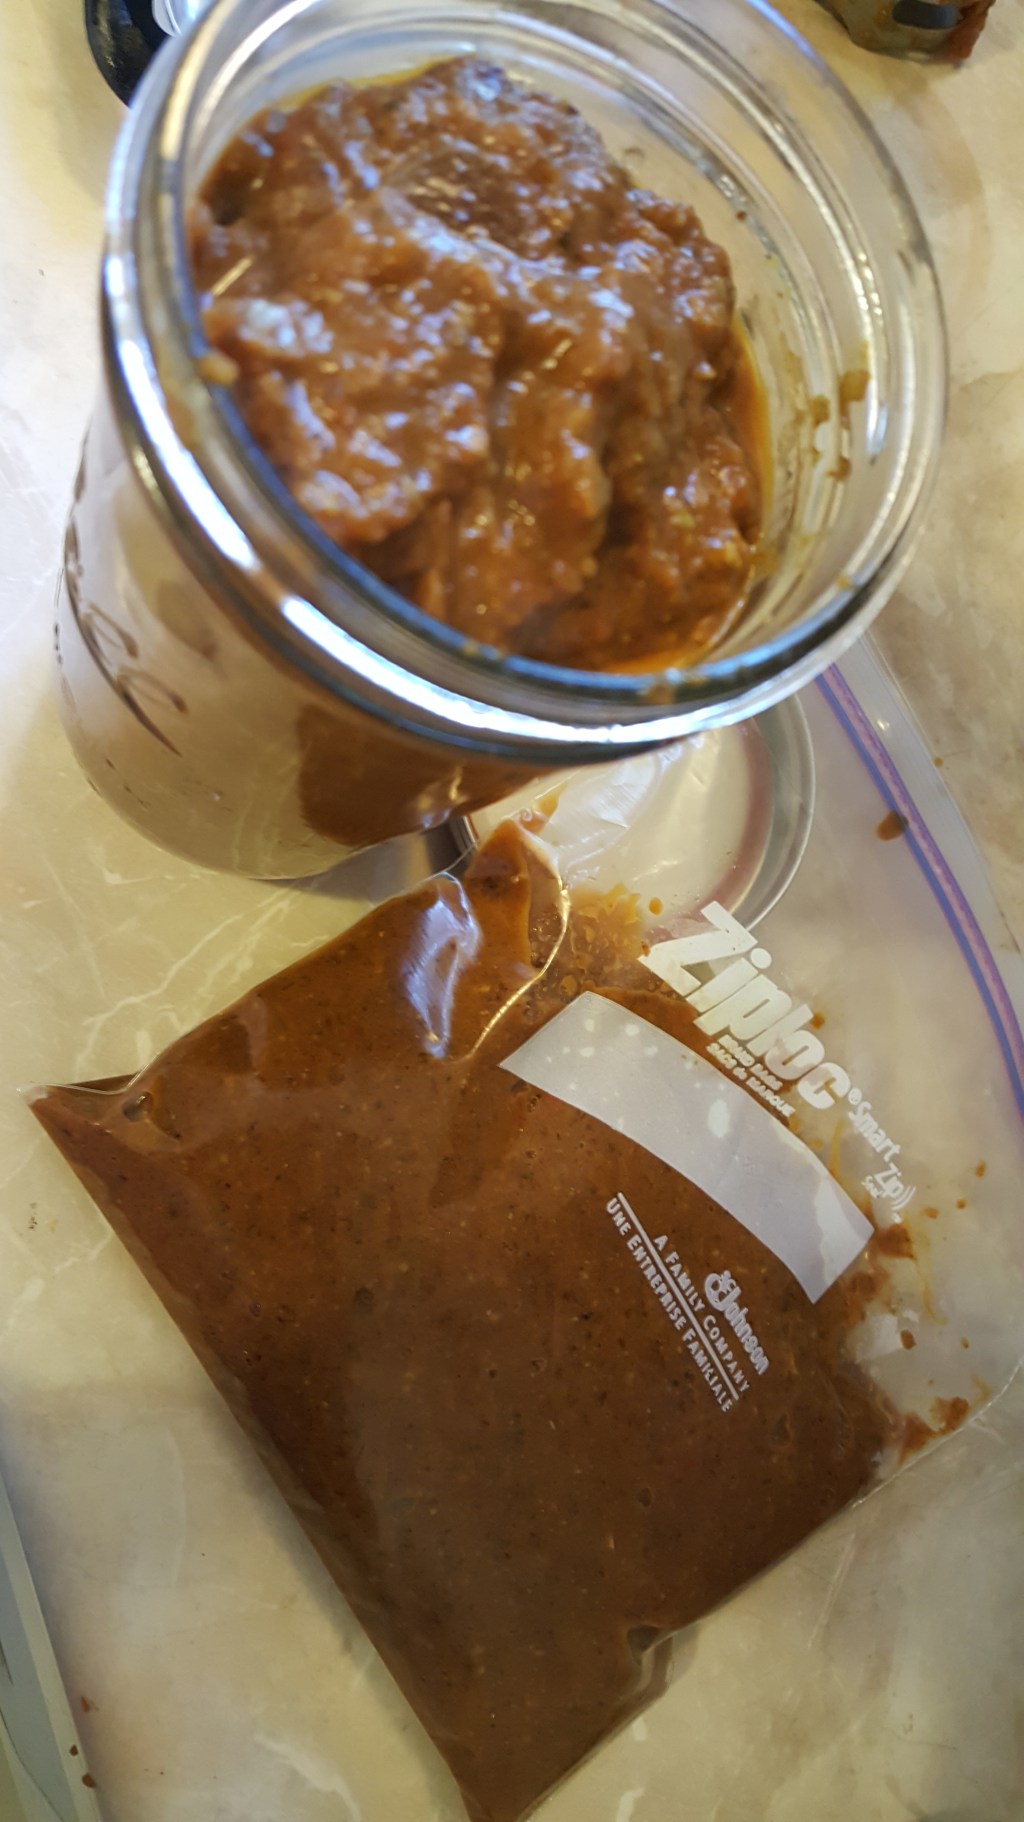
I have this thing for chocolate nut butter. It started late in life, like, after having two babies. Before that, I never really craved anything sweet, and chocolate was a take it or leave it thing. It still is often a take it or leave it. I don’t have a stash of chocolate in my pantry (most of the time), and I can go months without it. But not too long ago I stumbled upon a jar of chocolate almond butter at our local Grocery Outlet. The only reason I even considered it was because it was discounted AND the deciding factor was that the ingredients list was relatively simple.
Well, that started the slide. Not only did I really enjoy it, but my hubs really got into it too. Subsequent trips to the GroOut left us empty handed, as same stock is not guaranteed.
I didn’t grow up with Nutella. I know why, now, after reading the label. My mom was much too health conscious for that. The ingredients list reads like a horror story for any individual remotely aware of what is good or bad to put into your body.
When my hubs had asked several times whether I had tracked down a bottle of the stuff, and I kept coming up empty, I decided, what the hey, maybe I can make it myself
Turns out, I can, and for really cheap. Plus, you know what you’ve put in it, and there are no extras.
For under the cost of a pre-made jar (usually about $12 around these parts). I’d say I spent maybe $8 and the jar is larger than most of the choco nut butters you can find. So without further ado, I give you the magic ingredients:
1 jar of raw creamy almond butter ($5.99 at Trader Joe’s)- or whatever nut butter you’d like (the simpler the better, check to see if it’s just ground nuts or if they’ve added a whole bunch of junk. Also note that nut butters can cost a lot, depending on where you shop…so that’s why I gave you the hint on the TJ’s brand one- and no, they are not paying me!)
Approx imately 4 TBSP honey (I think I got mine from TJs for $6.99 keeping in mind you are only using a fraction of the jar).
2 heaping Tsps cocoa powder ( I already had it in my pantry, but let’s say around $6, more if you get organic, or the Dutch kind)
First you are going to need to mix the almond butter since it is most likely separated. Then you will have to use a bit of it to make some space in the jar for the ingredients you will be adding. I put the hubs to work on that, and he consumed several tablespoons worth on his breakfast toast.
Now, put in all of the above ingredients and stir until fully incorporated. You should taste test it and ad any additional amounts to suit your taste. I don’t want mine particularly sweet.
You can also substitute sweeteners, maple syrup is a great alternative choice. Different nut butters are also an option. I don’t do peanut butter, but I love sunflower seed butter if you are going for a more “peanutty” flavor.
This chocolate nut butter is great on crepes, on toast with raspberry jam, slathered on a graham cracker or just by itself!
Enjoy!
Next time I’ll share with you another great guilty pleasure- tasting chocolate that packs a high protein punch!
It has truly been a while since I’ve posted on this blog. A lot falls by the way side when you have a baby. Photography has been one of the last things on my list of to dos. But luckily, I decided to take my Nikon D300 with me when we went camping a few weeks back. Lett’s Lake, in Mendocino National Forest, is truly beautiful and I feel like the photos pretty much took themselves. I had some fun switching some images to black and white where I felt the colour was unnecessary. I’m not a landscape photographer; Ansel Adams pretty much did that better than anyone. No, I like looking for form, textures and sometimes the colour. However, there are a few landscape shots just because the landscape was calling out to be recorded. I do not profess to be any good at it. Below are my best shots, landscape photos included. Hope you enjoy.
So we’re not milk drinkers in this house hold. I ended up with a nearly-full half gallon carton of milk after making my hubby a birthday cake (first cake I ever made, but that’s a story for another time). I looked at him and just threw it out there: “what can you make with milk? ” and his response was to Google that exact question. The two top options were dulce de leche and ricotta. Well that started my creative cooking juices flowing. ..I had left-over pasta sauce and also a half box of lasagna noodles. ..why not make ricotta stuffed pasta? But first, could we pull off homemade ricotta?
Using the first recipe we found online we gathered these items:
1. 1/2 gallon milk
2. 1 and 1/2 lemon
3. 1 tsp salt
I brought the milk up to “just before” boiling when it’s steaming with a few frothy bubbles
Then I removed it from the heat, poured in the lemon juice and salt, stirred gently with a slotted spoon and waited 10 minutes. ..though you can start to see it curdle almost immediately. At this point my baby started to cry for the food only mommy can provide so hubby took over.
Using cheese cloth laid into a strainer set in an empty pot to catch the whey, he scooped the curds into it and let it sit another ten minutes.
Then all that was left was to fill the pasta with the ricotta. We were so amazed by how easy it was to make. Literally anyone could do it. No doubt we’ll do it again. So glad we found this solution rather than letting the milk slowly go bad and eventually dumping it out.
This is SO simple you’ll be laughing all the way to fudgesicle heaven. I came up with this recipe in about 5 minutes expecting to have to do a lot of doctoring and fine tuning, but it was great right off the bat.
On the verge of becoming one myself (currently gestating a little one of my own) I feel the need to stop and think about mom and what motherhood is all about.
I called mom today to wish her ‘Happy Mother’s Day’, but rather tentatively. It seems arbitrary to have just one day to celebrate someone so essential to my life. And I suppose it’s because she’s trained me well that I was so tentative; growing up she always said how silly it was to celebrate just that day, because she knew we loved and cared for her all year long. But here’s the thing, we actually do need this day. We need this day to remind ourselves to step back from whatever busy work we’re doing and think about mom and hopefully not just go through the motions of buying a card and flowers.
That brings to mind one example of what motherhood is: selflessness.
I’m not sure I’m ready to commit to that. I consider myself to be rather selfish. Up until now I have not had to really think about anyone else but myself. Sure, we love and care for our friends and family, we send them cards and give them gifts on the days designated to celebrate them, we do thoughtful things for them when we are so inspired…but we don’t do it EVERY DAMN DAY. That’s what moms do. Every day they wake up and devote themselves to their family, tired, sore, sick, hungry, whatever, there is never a day off. That is dedication. That is selflessness.
That sounds like a lot of work!
So number two, motherhood is not for slackers! Moms work HARD. Me thinks there is not a day when mom gets to roll over in bed and say, “I’ll just sleep in today, catch up on some TV watching and order take out…I’ll do groceries another day….the baby can feed itself, right?” I fear this aspect so very much. What if I do not have the stamina?
I turned to Nat in bed the other night and I said, “We can always just return him/her if it doesn’t work out, right?”
And we grinned, paused and then laughed, while in our heads we were thinking “We can’t return the baby! We CAN’T return the baby!!!”
Number three, being fearful, unsure, but doing it anyway: courageous motherhood. There’s no school for it, not even a licensing process. Moms learn by doing; by hitting the ground running. I am so grateful that my mom was a fast learner and a bold innovator in child rearing. I imagine when she didn’t know something she used all the resources available to her to figure it out, or she made it up- and look how great we turned out!
As a mom-to-be the question that arises is: can I do this? Which is to say, will I screw up? Is it possible to fail? And if so, what does a pass look like? What is success in motherhood?
Mom is the example because I think she passed with flying colours. First off she birthed me and Vieve with all fingers and toes intact- success number one (amazing how this is an overriding concern in pregnancy even though it is essentially out of my hands)!
But seriously, I think it’s this: that I know that I am loved 100% of the time regardless of whether we’ve talked just yesterday or two weeks ago. That if I have a problem, like an illness or an emotional issue I can talk to mom about it, all of it with nothing held back; and she will dispense wisdom I may or may not have heard before but is always music to my ears. And even when the phone has been put back in its cradle (yes, a cradle- she does not have a cell), I know that mom is still thinking about ways she can help and advise and will most likely call me again to fill in the gaps in the wisdom she dispensed the first time round. She’s always in my corner, even if her opinion is contrary to mine.
I look forward to family gatherings and mom time. I do not fit into the typical story of ‘oh gosh, we’ve got to visit family, let’s figure out how to make our exit as soon as possible’; no, I want to stay for as long as I possibly can. When I do have to go it is with a lump in my throat the size of a watermelon. That’s success in motherhood. That is all mom.
I only hope that I can be something approaching that for my little one.
Mom, I’m gonna need your help.
To my selfless, non-slacking, courageous mother: I love you.
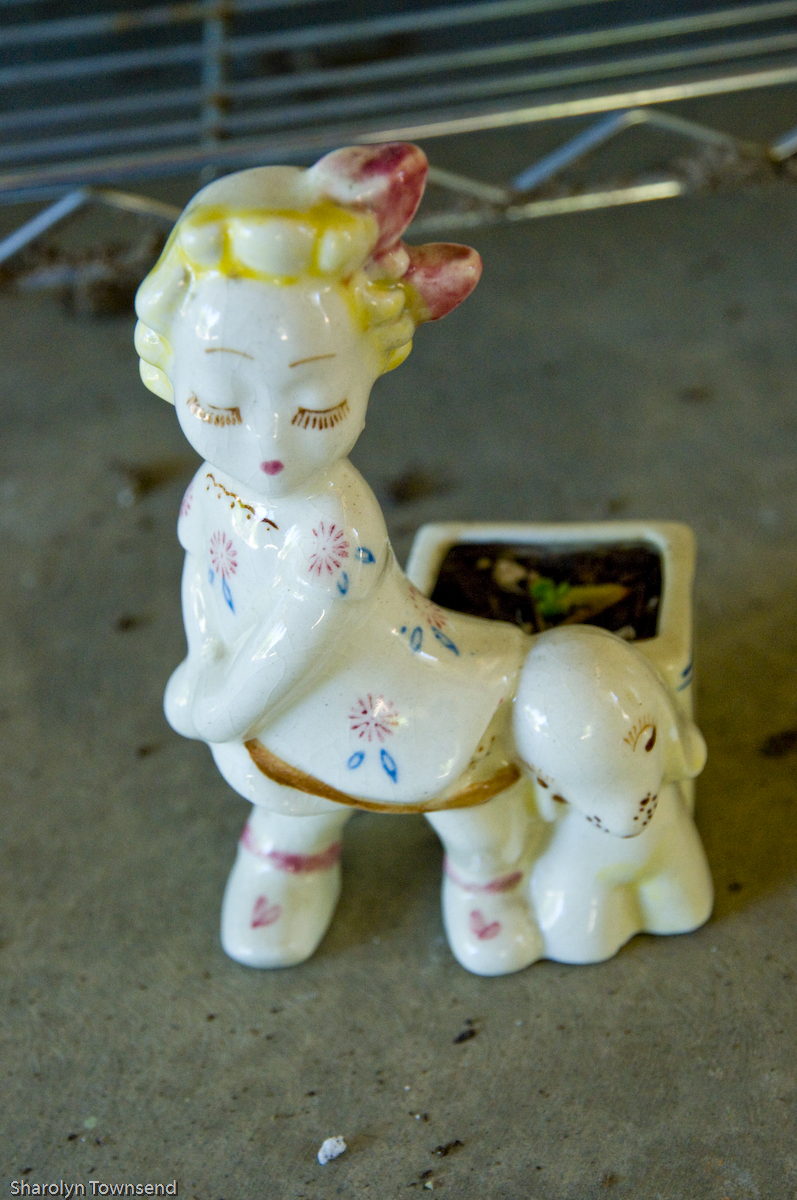
Anyone who has read a few of my previous posts related to plants knows that I love succulents. They are beautiful and for the most part easy to keep alive ( provided they have the right soil to start with and do not get some random plant disease). I like having plants around, but I don’t like having plants that demand too much of my time. If they can’t learn to survive with a little bit of neglect…well…they’re toast.
Enter the air plant. What?!? Why have I not discovered them earlier? I knew they existed, remember my aunts having a few when I was a kid, but never considered getting my own.
My interest was piqued when I saw a beautifully tendrilled green plant, sans earth, sitting on the counter top by the cash register at my local nursery. I asked a few questions about it but didn’t buy it. Then I saw it in a few more shops, sometimes just as decor enhancements. Suddenly I was hooked on the idea of getting a few. When my sister visited me a few months ago we stumbled on a shop that had a few for sale and I picked some up.
This is how you care for it:
#1. Place in filtered not direct sunlight, indoors.
#2. Spritz with water once a week and set it upside down for a few minutes to make sure water beads don’t collect on its leaves. ( If you want to get away with watering even less, put your plant in a bathroom where shower steam aids hydration)
#3. There is no number three, THAT’S IT!!
I’ve since ogled a few more exotic looking air plants and added them to my collection. The really fun part is finding vessels to hold them. Your local thrift shop is a great place to find unique and cheap glassware.
thrift ship glassware, 50 cents a piece.Gorgeous, mini, fuchsia air planta tall, cylindrical glass vase is great for the leggy ones.
This one is my favorite. It’s ball-shaped and fits perfectly in this min fish bowlI found this cool looking metal goblet which fits this air plant perfectly
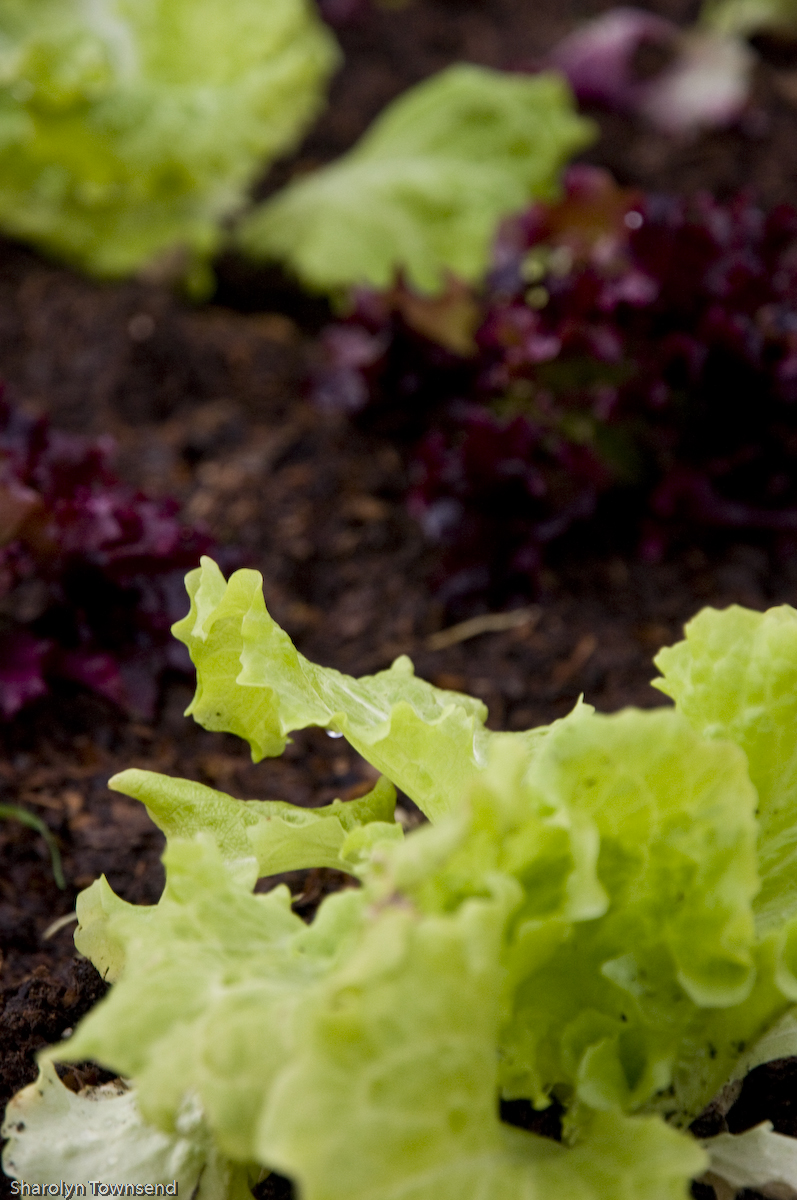
So, as it turns out, rhino dung is fantastic. Mixed in with the existing soil in proved to be the perfect environment for our lovely veggie garden. I’ve harvested two bok choi crops, tons of lettuce and some chard. The ones I planted in the planters..not so good. Probably too confined, and no rhino dung in those so of course they’re inferior!
yumptious peas
lettuce that doubles in size every time I harvest a few leaves.
arugula gargantua – exponential growth each time I harvest. I’m drowning in the stuff
chard
We’ve also dig up another patch of ground, not a raised bed, in which we are going to plant the veggies that no animals tend to dig up, i.e. zucchini and spring onions. We’re also starting some tomatoes for that little plot.
newly dug bed, also featuring rhino dung!
Slowly but surely our garden grows, by both senses of the meaning. Our backyard is still monstrously huge and could stand another bed. The question is whether we can afford the water bill to sustain said garden beds. We plan on mulching with hay or sawdust in an attempt to trap the moisture. Let’s hope it works.
my man going on a weeding-fest right after a rain – best time to do it!
So, the hubby was home this weekend – the WHOLE weekend which was a true miracle as he usually works. So we decided to put in some time on the house. Our master bedroom is now completely sheet-rocked, our tub re-caulked for the third time (don’t ask), we have a treasure trove of great tiles from the Re-Store for our bathroom remodel(half off on tiles that day!) and…we started a garden!
It had to be done. We have a massive back yard. So big that we are completely overwhelmed and don’t know where to start with the landscaping. Especially landscaping on a budget. So, we thought, the one thing that was doable was re-assembling the planter box we’d taken from our previous garden at our old rental. Hubby had gotten two loads of composted rhino dung from work (he’s a guide at a place called Safari West here in Nor Cal) so we tossed that in and then went to our local garden center to pick up some regular soil to mix in and did a little cheating by buying our veggies already sprouted. Insta -garden!
lettuce of two varieties
arugula!
bok choi
Since we have no idea what rhino dung can do, we were afraid it might just kill the plants, so as a back-up I also planted a few veg in some little planters with regular soil.
planter with lettuces, arugula, bok choi and rainbow chard
snap peas
Et voila! It was just about he easiest thing we could have done to feel like we were moving forward on making the yard our own.
I’m an artist, so I should know about colour, right?
Wrong.
News flash: interior decorating is nothing like painting on a canvas. I know…a house is just as much a blank canvas as a real canvas for the creative soul…but this creative soul is having a dark tea-time of the soul as regards colour choice for our house.
For the past couple of weeks I’ve been trying to re-invent our space, which, when we moved in was awash with a sort of piss-tinted hue throughout the entire house (A+ for consistency I suppose), not to mention a musty, smoker-lived-here smell that we were anxious to exorcise. I happily ran down to our local hardware store, spent a few puzzled/overwhelmed minutes gazing at paint chips ( like a kid in a non-edible candy store you might say) before going with a gut instinct for a grey-blue tone.
Excellent. No problemo. The colour went on magnificently, only it was a little too subtle. “Dang!, I knew it!” I muttered under my breath. At the last moment I had let my husband cloud my judgement and went a shade lighter than I’d wanted to. Needless to say, though we liked the colour, we agreed it was too light and ended up repainting. No real problem, but additional time was required.
Then it came time to paint the hallway. I didn’t want a repeat of the last time. I wanted to go bold. I have this gorgeous Laotian tapestry we picked up years ago in Thailand and working from those colours I decided to boldly go purple. Crazy, I know. But I felt it in my gut, this was going to work and I would consult no one. Purity of vision and all that.
paint chips and Laotian tapestry
A trip to the hardware store, an unwavering finger proudly pointing at my colour swatch with the command of, “mix this” and four hours of painting later (I could have bought the $2 sample and painted a wall, but why go the wussy way?) my hallway looked….well, it looked like …a cut of pastrami had exploded on my walls. A mix between gaudy easter purple and say, SPAM…or as my sister-in-law put it, “sort of intestinal”. Yeah, that’s what I was going for.
Back to the drawing board. Back to the paint aisle where a helpful fellow wanna-be interior decorator gave me tips on the trendiness of brown and blue after overhearing my discussion with my sister-in-law…until she saw the colour swatch I was working with already and a look of horror edged into her expression and an “oh” escaped her lips, like “oh, that kind of blue, well then there’s no colour that will go with that“, that kind of “oh”.
When all else fails, stick with the colour you’ve got and just go with shades ( I don’t know that that is a design thing, but I have a gut feeling I’m right). So that’s what I did; a bolder shade of the existing colour. And you know what, I love it and so does hubby. In my books, that’s a success.
This interior decorating is harder than I thought. When you make a mistake, you can’t just paint over it with a big brush and a few strokes, no, you’ve got to cut in (gack) and roll for hours.
And gut instinct that works when painting on canvas does not necessarily work for painting walls. Lesson learned. I could benefit from reading a few decorating books.
After all the frustration, it is at last resolved. Now it’s time to sit back with my Winter Spiced Ale and enjoy.
..while sitting on my Craigslist find… Not bad, eh? But I’d still put me down more in the dummy column when it comes to decor. However, I do shoot half decent photos. So enjoy the illusion of a magazine ready home (hint: it’s all in the cropping!):
our fireplace, now painted white with the blue-grey accent wall complete.
I’ve been feeling immense guilt at having not posted in over a month. I was in the midst of a move, and blogging about creativity was far from my mind. That’s not to say that I haven’t been creative. I’m lucky to have a job that requires creativity on a daily basis, so that even if I am not creating at home, I am creative at work. I have some great “Keep It Simple Genius” recipes I will be posting soon. Right now, I thought I’d share some photos.
Photography is something I’ve been away from for quite some time. I’ve been meaning to get back in the saddle but have not been inspired to take the ol’ camera out of the saddle bag as it were. Then I was asked to photograph a fundraising event at my local art center. The event is called the Soup-er Bowl ( get it? ) which leads to no end of confusion when said verbally without the benefit of seeing the pun. It’s my favourite event because it involves ceramic bowls and soup – LOTS of soup. My sister would approve as she is a soup junky. Basically, you pay $45 and you get to choose a bowl that’s been hand-made by one of the students ( my mother-in-law makes amazing bowls!) and then you taste up to 14 different soups from local restaurants and vote on the best one. I treat it like an Olympic sport. Have you ever tried to eat 14 different soups at a sitting? It is tres difficile. But I’m usually up to the challenge – it’s called a muumuu and no food all day leading up.
This time around I was simply the photographer. As sad as it was to not participate in the yumminess, I was freed to just focus on getting the shots.
The lighting was tough – mixed lighting (mostly halogen) in a dim, cavernous room at night. My flash unit wasn’t working because I had an accident with a leaking battery that killed it. Aargh! So, I had to rely on a steady hand, highest ISO I could use without too much noise and a wide open aperture at f 5.6
Sorry if a bit of photography speak snuck out and made you blank out momentarily (the photographer in me).
I was nervous about doing documentary photography. So much happens at the same time it’s hard to know where to be and how to choose the shot. If you lose the moment it’s gone. Not to mention that I’m shy about being all up in peoples’ grill. It’s not really my forte, but I tried to relax and just have fun with it. I even got up on a stool in the middle of the crowd to get better perspective. I was surprised to discover that people just forget that you’re there (so much so I had to make sure they didn’t knock me from my stool). I can’t say that I had a break-out, spectacular, Henri Cartier Bresson-esque photographic moment, but I was pleased. Here are the results:
A whole month has slipped by with nary a post. When faced with slew of stresses, work and life related, I have a hard time staying creative let alone document and write about it. Excuses, excuses, I know. So, to show that I am not in a complete creative dry spell, I’m posting a pic of the work I’ve recently completed: cat and dog Christmas cards. I discovered that, while painting was almost too involved in the midst of all the things I’m dealing with, drawing is something I can do quite easily; all I need is paper and a ballpoint pen. I’m very happy with the results. This past Saturday I had these for sale at the farmer’s market for the first time. It opened a whole new can of worms with regards to requests for specific breeds, of which there are way too many to draw and have printed – but that is a whole other story.
These are the originals before they headed to the printers to be made into cards:
I’m quite happy with them…and crossing my fingers that others are too and want to buy them, or else I’ll be swimming in cards for the next couple of years and acquaintances will grow tired of the yearly pet Christmas card!
Let’s face it, I’m overwhelmed. I have a little too much on my plate and I need to at least acknowledge that fact if not change it.
The good news is that the plate is loaded with mostly creative ventures. The sucky news is that I have more ideas than time. If only I could leave the day job to do art full-time. But if my Farmer’s Market sales are any indication of my success, I’d better stick with the day job! Same ol’ artist’s sob story; can’t make a living from my art.
Only, I don’t believe that. I believe that one day I will find my niche and I will tap into an as yet undiscovered reservoir of art patrons who get what I do, like what I do and want to pay for it too! Yes, that got rather rhymy.
I’ve been plugging away at the Farmer’s Market, making myself visible, going through the chore of set-up and take down, for those few moments of joy when a person has the courage to actually walk into my tent and really look at what I do. When they laugh and enjoy any of my paintings or drawings, I feel immense satisfaction. I feel even more satisfaction when they like it enough to want to take something home, even if it’s just a little art magnet or card. Pieces of my expression out in the universe!
I’m trying to put out of my mind the other stuff, the business stuff like paperwork: applications for fairs and their fees, logistics of set-up and schedule, even casting my mind forward to tax time – YIKES! Panicking over cost vs income. I seem to tick something off the list and then add another two.
I’m actually losing sleep over this stuff. I never lose sleep, I love sleep. I’d chose sleep over breakfast, I’d EAT sleep for breakfast.
Just get through the season…i.e. the Christmas selling season, and then I will take stock. What works, what doesn’t. What I can and love to do and what I can do without.
I leave you with some drawings I’ve been working on. I’m considering having them printed as Christmas cards. I’m enjoying drawing tremendously and am wondering why I’ve been away from it for so long. I hope you enjoy!
So, as I’ve mentioned before, we didn’t put much thought into our garden this year being that we thought we were buying a house and moving out. Regardless of our neglect, the garden thrives on. And to his credit, my hubby waters the place every morning before he goes to work. In regards to actually planting anything, those that were are long gone:
Seedless Bok Choi
This is the Bok Choi I planted in early spring hoping to have it ready before the heat…unfortunately my timing was again off, and it bolted. I kept it in the bed, hoping that they would have some seeds to harvest…but alack and to my horrified dismay: seed pods with no seeds in them! Can anyone say Monsanto? I blame them for everything!
But on to cheerier, hardier things:
Mystery Squash
Early summer my hubby discovered a squash plant of unknown origin growing in a corner of one of our raised beds. Actually, he found many, but pulled all but one. This move is something he regretted, because as the plant grew, it formed lovely flowers, but no fruit.
With our non-expert, non-researched, unfounded opinions, we concluded that the plant would be a dud because there were no other plants around it to aid fertilization. So my hubby, unsure of what to do with the many gangly arms the plant was putting out, decided to strap them along the top of our fence. If they weren’t going to bear fruit, they were at least going to green up the place and we were going to enjoy their blooms. Well, sure enough, suddenly the splendid thing started to bear fruit…and it turns out to be a most amazing squash (exact type not yet identified) that I had discovered I loved last year at the farmer’s market!
The Fruit of our Non-Labor
Well, if we wanted to stop it from bearing fruit we couldn’t. The thing is a monster growing machine of the most impressive kind. Our impromptu “Hanging Garden” is such a success it even reaches into our neighbors yard where it also hangs it’s fruit tantalizingly. We are not opposed to sharing, so when I finally met our neighbor the other day, I encouraged her to please pluck and use the squash encroaching on her side of the fence. Not just that side of the fence, but the back-end too:
Over the fence facing a back fieldHanging Bounty
The trick is to know when to pick them. One must wait until they are a deep red-orange for optimal tastiness, but weight is also a factor and I’m not sure if the stems can sustain such a load for too long. If anyone can hazard a guess as to the type of squash it is, please let me know!
I ventured out into the back field to take these shots, knowing full well I’d pay for it. You see, the back field is empty save for two things: moles and goat head weeds. Both have their disadvantages for gardens…and walking. We seem to have the mole problem taken care of this year, the goat heads are another thing. My hubby has been waging war with them since we moved here. If you’re not familiar with them, feel free to wikipedia the awful things. They grow, well…like weeds, and produce the hardest, spikiest seed that when in contact with anything rubber and full of air, aka bike tires, will pop them like no ones business. If one is unfortunate enough to track several of those into the house, and say those awful things actually relinquish their spiky hold on the soles of your shoes, then watch out! My bare foot has come in contact more than once with those nasty buggers hiding in the carpet tufts and has never failed in eliciting a scream of pain followed by a stream of expletives.
When visiting the field, one has to resigns oneself to the fact that there will be a lot of goat head removal before going even near the garden or the house or even drive-way (where our bikes reside). Check out the bottom of my flip-flops from my short photo-op adventure:
Goat Heads make spongy work of my poor flip-flops
More than once, a spike has managed to make its way all the way through the sole to my tender tootsies. Nasty stuff.
Moving on from nastiness, I leave you with a few images of the glorious growth in our Accidental Garden:
Morning Glories
Black tomatoes
(okay, we did plant the tomatoes, but also unplanned ‘cuz my boss begged me to take a few off his hands (he had over 60 tomato plants donated to the club and couldn’t fit them all)…so kind of accidental if you think about it…)
Forward momentum. That’s what I’m all about these days. After an inspiring visit to Canada to see my sister doing her Farmer’s Market and other shows, I wanted to get started in my neck of the woods. I enquired about the local Farmer’s Market but didn’t hear back, didn’t hear back…and then suddenly an email on Friday asking if I could set up on Saturday!!
Well, I couldn’t say no, but I was also nervous about “yes” because I wasn’t prepared. But, I went for it. Luckily I could borrow a tent last-minute from my husband’s place of work, and a few tables from my mother in-law. It was hasty, but it worked out in the end:
My rushed set-up. Not spectacular, but it did the job
I’ve now committed to the market every Saturday until the end of the season. That’s 12 shows total. I’m not sure it makes the most sense monetarily, but I am looking at it as excellent promotion. How is anyone supposed to know I exist if I don’t get out there? The wonderful thing is that, after only being here for a few years, I already know quite a few people in the community and they are quite supportive. It seems I have a lot of interest from tourists and locals alike with my pet portraits.
I’m selling pet portrait commissions along with small items such as prints, cards, small hand made ceramic charms and hand drawn magnets such as these:
Hand made, one of kind magnets
As well as cards, which I’ve posted before, either here on this blog or at my sister blog: www.vieveandlynsker.wordpress.com where my sister and I share all things creative.
Yesterday I showed up at Costco, ready to buy a tent with walls, only to discover that “summer is over”, at least, according to retail land. So, I was a bit flustered having no back-up plan. But after a quick consult with my very capable and steady sister-in-law, and the help of her smart phone ( I need one of those BAD!) we were able to locate a shade canopy, not exactly the style I wanted, but available at Friedman’s. At that point, I would have bought anything at any cost because I just wanted to get a damn tent for this upcoming Farmer’s Market. Luckily I was in luck, because though the tent didn’t have walls, it happened to be on sale, so instead of $100 it was $89. Sold! What a relief.
I’m not totally where I want to be in terms of the perfect, most simple and light market set-up, but I’m getting there. Wish me luck!
So, I was trying to throw together a last-minute portfolio for a job listing I found on Craigslist calling for an illustrator…and I found the most interesting things I’d long forgotten about. It’s amazing how one can create something, put a whole lot of effort and time into it and then completely forget about it. Finding them again is like a revelation; memories of making it comes back in a flood (…or sometimes it doesn’t and it’s even more of a mystery “Wow! How did I do that?”).
In the pile of lost art I discovered these characters from years back when I was teaching ESL in Korea. I remember deciding that it would be helpful to have visual cues while telling the story in English. It would also help to keep the kids’ attention. As I recall, I was having so much fun I stayed up into the wee hours of the morning colouring these. I laminated them and stuck them on popsicle sticks. When my year at that particular school was up, they asked if they could keep them and I said no. I’d put too much of my creative energy into them and was not willing to give them up…what a Scrooge, eh? The thought of them being abused, folded and destroyed by little hands was too much.
Interestingly enough, the Gingerbread man in the story I told did not have a fox in it, but rather, an alligator!
They were done with colour pencil. I had a limited number of colours so in order to have any complexity I had to mix layers and layers of colour. I love how they turned out.
Finally I finished this painting. It’s been in the works for a while – not because it takes long to paint, but because I had to walk away from it for a while because my energies were focused elsewhere. It was really nice to return to it and have it happen really easily. Like I was saying to my sister, painting rocks feels like a spiritual practice; it’s deeply calming and peaceful. I hope to do many more of these. As it is, it is only my second rock painting.
My day-time job is teaching art to kids at the local Boys and Girls Club. I’m blessed that my working life still involves creativity. It has surprised me over the years how inhibited some kids can be, I had assumed that the joy of childom was to be very uninhibited. Instead, I find the majority are worried about things turning out just right or perfect. So, I approach art in as non-judgmental a way as possible and encourage them to “not do as I do and think outside the box”. Naturally, however, they want to copy me. I used to make an example piece before class to show the kids, but things always ended in disappointment because the kids couldn’t exactly replicate it which was frustrating and it stunted their imagination. At one point I tried to dumb down my art, but that didn’t work for me and I felt like I wasn’t setting a good example. I’ve arrived at the point where I say to the kids “I am A LOT OLDER than you- I’m 31, imagine how good you’ll be in 20+ years!” That seems to appease them a little bit. Also describing the project and then doing it alongside them, effectively creating and discovering together seems to be the trick.
Each week this summer we have a theme and I ended up with some pretty neat artwork by the end of it. I thought I’d share. This is not anything I would usually think to do, but because it was with the kids, I discovered I was less inhibited and in trying to teach the kids open-mindedness and a “let’s see what happens” attitude, I ended up opening up a lot myself. I’ll show you some things I made during Pirate Week and then Super Hero Week:
This was a project where I showed the kids pictures of pirates and encouraged them to come up with a character all their own. I demonstrated by drawing along-side them. They liked this guy so much that they asked my not to color him but photocopy him instead so that they could have a coloring page. I obliged.
We worked with acrylic paint. I initially started painting this guy to demonstrate how a painting looks finished once all the white of the page is filled in (kids have a resistance to “taking their time” and “filling the page”. I ended up really liking this guy. The kids encouraged me to add a parrot.
The next week was Hero Week. The theme was essentially about local heroes like firemen, policewomen etc., but what was much more inspiring were super heroes with super powers, so we stretched the theme for the sake of art!
I kind of drew a blank on what to do. I often encourage the kids to draw what they like and know (rather than something so outlandishly difficult that they don’t know how to draw it and end up begging me to do it instead), so that’s what I ended up telling myself to do and came up with: Super Artist!
I taught the kids about cartoons and the various cells they could draw. We went over a few conventions and then we went at it. I encouraged everyone to come up with their own hero they could be proud of. The kids as a group agreed that a hero is someone (or thing) that helps and protects others. So I came up with an octopus that saves the little fishies. I also turned this into a coloring page because the kids begged me. I was impressed by the kids’ creativity on this one ( wish I’d had the foresight to bring my camera to work and take pics of their amazing work!).
This was a watercolor class dealing with wax resist, sharpie outline and then salt for added visual texture. This was my demo piece and I really like how it came out!
So, though I’ve considered the art I do in the studio and the art I do with the kids very different things, I realized after those two weeks that the separation is beginning to blur. The more I bring what I do to the table, the more the kids seem to be into it and respond to the lessons and the more fun I have!
I appreciate all my kid colleagues who helped me with this break-through moment!
Fill clean, dark-coloured, spray bottle with filtered water (can be distilled but not necessary)
add 4-8 drops lavender oil
That’s it. What? You expected more? If this were rocket science, I would not be doing this my friend.
Shake and spritz liberally. But not too liberally if you need to get things done because it might put you to sleep.
Lavender Laboratory Experiment #2: Foot Scrub
What you need:
Clean container with screw top lid
sugar (any kind; the grain and texture is up to you. I used pure cane sugar)
olive oil
Approx. 8 drops lavender oil
pinch of lavender buds
My jar was a small face-cream-sized jar, so I used a 1/4 cup sugar and filled the rest with olive oil and mixed it. You can use another oil like almond or grape for example, but a thick oil is nice for something as gnarly, dry and cracked as your feet very moisturizing for your deserving tootsies.
Note that lavender buds are optional…they can look a little bit like mouse turds on the floor of your tub after a good foot scrubbing…so if you’re not easily spooked (meaning you don’t have a tendency to jump into the air landing on the most elevated surface available while screaming “mouse! mouse!”), it’s easy enough to wash down the drain and adds a nice touch to the scrub, otherwise just leave it out.
Lavender Laboratory Experiment #3: Lavender Salt
Any amount kosher salt (in this case about 3 tablespoons)
An appropriate amount of lavender as to not over or underwhelm the salt (in this case, a pinch)
Combine.
Note: If you have a sea salt mill, combine coarse sea salt and lavender buds in the mill for a more fragrant salt.
Aye, aye captain, but what to do with lavender salt?
It’s amazing combined with lemon and butter(or olive oil) as a rub for chicken destined for the grill…or so I’ve been told and plan on trying.
Or perhaps on buttered popcorn…yum!
Here’s what I did do:
Pan fried asparagus with butter and lavender salt.
Need I say more?
…okay, just a little more:
As you can see, my experiments are none too scientific as I didn’t provide any measurements ( okay, I did mention a ‘quarter cup’ once and ‘a pinch’ more than that…but how big are your fingers compared to mine? See what I mean?),which is to say, experiment for yourself and see because how am I supposed to know how much scent or flavour you like? Have fun and let me know how your experiments turn out. Got any amazing lavender recipes or home-made cosmetic ideas? Please share!
My friend and I recently went to the Lavender Festival in Sonoma
The entrance fee was a mere $5 dollars and well worth it. Vendors were set up all around a lavender field full of the Grosso and Provence varieties.
I sound like I know what I’m talking about but that’s only because they also had on-going seminars about lavender and what was growing in that particular field.
Both my friend and I were rather excited and frolicked through the place gaily for several hours. There was food, wine, stuff to buy, wreath making, photo ops and an outdoor spa demonstrating some of the products.
In the end we came away with some pretty neat stuff. We wanted to buy the whole place, but in an attempt to be conservative ended up with a 16 oz bottle of lavender oil and a bag of edible lavender to split and from which we could make all the other products on display there ( or so we hoped in our inspired state).
Did I end up using any of my portion of lavender oil (all 8 oz of it)? That my friends is for another post. For now, just enjoy the lovely view of lavender! Get yourself to a lavender festival if you get the chance- a great way to spend a few hours ( and a few bucks)!
If you read this blog it’s a) because you know me or b) because you actually like what I post. To both groups I say thank you. It’s not easy taking on a blog this unfocused. Most successful blogs I read are on one topic and one topic only. I admire those who can do it. I, however, am an all-over the place girl. My creative energies go in way too many directions to count. This blog is a way of trying to find a common tie…haven’t found it yet, except that it comes from me. I’m a “Renaissance Girl” someone told me. I like that.It explains why try as I might, I am unable to channel my energies into one thing. And, you know what? I’m okay with that.
So, thank you to those who embrace the chaos and tune in to whatever I’m up to this time! You are much appreciated (and probably a Renaissance Guy or Gal yourself!)
Before you dis it, hear me out. I know there’s a lot of slap talk about it because of Bikram himself who has made a pretty penny from T M-ing his sequence of postures. I don’t care about all that. What I care about is whether it works for me and it does.
Before Bikram Yoga, I could not stick to any form of exercise, nor could I stick with a yoga practice. Holding my leg in the air for five minutes and deep breathing just didn’t cut it. For some sick reason, I love being in a room that’s over 100 degrees farenheit, sweating my life away as I hold various nutty/frustrating postures. The fact that my brain is often yelling “Let’s get the FUDGE out of here! I’m dying” is one of the challenges I embrace. Yeah, the postures never vary (except when an instructor is feeling particularly motivated and makes us hold a posture WAY longer than the standard minute) but that’s what’s good about it. You work and work at a posture until you think you know it, and then it deepens and gets better and better beyond that.
Anyway, this is not a rant about why Bikram yoga is good. Like selecting wine, if you like it then it’s good for you.
No, I want to vent about my session today which started out all fine and dandy. The heat was blowing, I was lying on my mat in Savasana waiting for the class to start when a none too lovely aroma filled the air…something like rotting cabbage.
Some yogi or yogini nearby was letting off stink bombs. Now, I know that we all have gas, and yes, sometimes we can’t control it…but this wasn’t the first time. And it wasn’t like it was just once…no, it was peppered throughout the entirety of my 90 minute class…usually in the toughest posture requiring deep breathing – the exertion being the reason for said stink bombs. Talk about a test to see how inward one can go. How can one deep breath with that kind of gas floating in 110 degree air? Seriously, I didn’t know whether to breath or gag. Not to mention, in the silent room, it was hard to not blurt out, “Seriously?!?” The gas was so enveloping I felt like others might think it was me. Talk about leaving pride and ego at the door.
To Stinky-McStinkfarm- please, please,please release your gases in the bathroom before the start of class…or adjust your diet, I detected too much asparagus and or vegetal matter. Not all of us are cut out for vegetarianism.
No credit to myself, the garden is looking pretty swell.
It’s my hubby who goes out every morning and waters the place. He also fought a valiant battle with earwigs and won. It took a bit to come up with a strategy, but once implemented the earwig populations was decimated. Our beer traps were not working so well- it caught snails and slugs but they weren’t the main issue. No, my hubby launched his attack at night, headlamp beaming on the hopelessly exposed earwigs who had unwittingly emerged from their day time hiding places to manger (pronounced “monjay” en Francais) on our romaine. The strategy? Flick as many possible into a bowl of soapy water. The survivors who missed the dip: death by rock. I myself was not out there. I was lying in bed, trying to sleep over the din of rock hitting its target- Crack! Crack! Crack! It must have been satisfying because he was out there for quite some time. He proudly showed me the shriveled and mashed carcasses the next morning.
I won’t show you shots of the massacre lest it unsettle you. But here’s a lovely escargot, another garden terror. Our method of snail removal is to toss them over our fence into the back field. This guy is blissfully unaware of his upcoming aerial flight.
Our spring onions have been way over grown since fall. We decided to keep them in to see what would happen. After all, isn’t this just one grand experiment?
Last month they started flowering, and now check out the seeds:
Unsure of how to harvest, but unwilling to resort to google, I simply picked up a bowl and started massaging the heads until the seeds fell, en mass, into the dish.
My sister had taught me a nifty trick with morning-glory seeds: to separate seeds from the husks, simply blow. Seeds are heavier and will remain in the dish. So I figured, maybe it’s the same deal with these seeds. Thankfully, I was right and didn’t end up with an empty dish.
So now we’ve got seeds galore. Not sure what to do with them as it’s a little late, perhaps, to be sprouting them for this year. But I feel like such a pioneer when I gather seeds instead of buying them at the store. I feel like, “wow, I am da shit, I keep a self-sustaining garden”. The next step would be to actually label the seeds I harvest as it makes for some awful guess-work when the next season comes around. So, yeah, I’m a pioneer but not a very organized one…
The elephant garlic that started to magically grow this year, having skipped the previous year when it was actually planted, had started to grow flowers on top. We caved and googled ” when to harvest elephant garlic” and learned that we were really late. For some reason we thought we had to wait until the stalk shriveled and dried. Not so, you’re supposed to wait until the bottom leaves brown but the rest is still green. Then stop watering for a few days to allow it to begin to dry and then pull it from the ground. So we scampered out to the garden ( as if a few extra seconds would make us any less late in harvesting the things) and we gingerly pulled them out and found:
Note the little garlics hanging off the roots. No idea what that is exactly- must be its way of propagating itself. I imagine if left in the soil we’d have a whole planter box full of elephant garlic come next spring.
They cleaned up nice. Hopefully they will “set”, that is, dry nicely. Maybe we don’t even have to really worry about that since we only have two and I plan on consuming those bad guys quite soon.
Our green beans are growing..or should I say green bean singular. I think I will need to buy a miniature frying pan, because at this rate, that’s what I’ll be serving up, one green bean at a time. I can’t imagine that we will ever have a handful all at once…but you never know.
I leave you with a few more shots of the garden and its bounty!
So, way back when, I started a little propagation experiment with some cast off succulent leaves I found at the local nursery.
Check out my April post title “Never Go Near A Garden Center a.k.a. Human Magnet” to see where it all began.
This is mostly a success story, but as with all good stories there is also a little bit of bad, so let me get that out of the way:
Back in April when I got some new succulents I bought one that was called Bear Paws. Loved them. Planted them right alongside the other one I’d purchased. I kept them indoors out of the frost, coddled them, kept them in filtered light and spritzed lightly with water. It did great for several months, and then inexplicably, the paws started to drop off. At first I thought it was because the curtain had snagged one and amputated a paw…but over several days they all started to droop and one by one they fell off. Needless to say, another one bites the dust. I don’t even have a picture to show you because it all happened so quickly there is literally nothing left to show.
On a happy note, even though it’s neighbor died a horrible and inexplicable death, this succulent is thriving and starting to form a flower!
But oh how I loved that Bear Claw. I will have to give it a go one more time. I will not be defeated!
Now on to the success story! Remember the cast off leaves and the bed of Perlite and the beginning of growth? Check this out!
This is what I’d been waiting for, the original leaf is now shriveled and discolored which means the new plant forming at its base has used up all the leaves good stuff and needs to be planted. Glad to oblige!
Check out that root action!
I just so happened to have the perfect little planter: a retro, made in Japan, cute as can be, ceramic girl with puppy planter:
Et voila! If I can do it, you can too! All it required was patience waiting for the little bugger to start doing something. It’s really quite enjoyable to watch the process inch along.
So get busy, start scouring for those poor abandoned succulent leaves at your local garden center!
It took me years to realize that much of what I did, the decisions I made, were because I wanted dad to be proud of me.
This surprised me when the realization struck. For most of my childhood dad was more of a background figure. He supported mom in her child rearing ideas and he was at work a lot trying to put my sister and I through Waldorf school.
In many ways he was a mystery to me. Our communication was something that developed a lot slower and grew as I got older.
I now I see that I am so very much like him in many ways.
It’s amazing how that happens. Somehow it’s in the DNA.
I’m so amazed by my dad. He’s shown me through the various stages of his life, through health and then sickness and back, how very strong he is. He’s shown me that it’s never too late to pick up a guitar and learn it, sing in public, start something new and creative, find spirituality, and open your heart.
I’ve been blessed to have a father who has always been here for us, our rock whether he knew himself to be that or not.
And yet, the winding path of my life has led me to a point where paperwork is the order of the day.
It started small, as all things do.
In the very beginning it was just a small thing: a social security number( rather a Social Insurance Number since I started out my paper filled life in Canada) so I could get my first job…then income taxes. Once in, the ball kept rolling. Then it was license and then travel visas…then I went and fell in love with a California boy and whoops, here we are married (marriage license, more paperwork) and in the process of becoming a landed immigrant -mondo paperwork!!
Currently we are looking for a home and went almost to the end of a purchase in which paperwork for the loan and purchase, appraisals, insurance was ..monumental…(sigh)
And now… I’m trying to truly launch my artist’s career becoming legit by getting a business license and seller’s permit…and boy oh boy am I in for it! I attended a free small business seminar and simply put, had my mind blown by how regulated and fraught with paperwork going into business is. I am at the point where I could freeze out of sheer overwhelmed-ness (I know, not a word) or slowly begin to slog forward, as I have with immigration and with house buying etc. It’s helpful when you have a partner to slog along with you (lots of paperwork lingo is confusing, so it’s good to have a second opinion!).
But isn’t there more to life than paperwork? How did it all come to this? When did papers begin to rule our lives? I know it’s necessary, without regulation we could devolve into chaos. We want freedom but we don’t really want freedom, to go back to the days of yore when we had to defend the homestead shot-gun in hand. Were there building permits? Heck no! Building inspectors? Heckity heck no…but there were taxes, always the taxes.
My utopian dream would be a world in which no paperwork need be filed. No, scratch that…I’d be content with a career that was so successful I could pay someone else to do the paperwork.
The fear is that there will be so much of the paper stuff that there won’t be nearly enough time for the art stuff. I know I am just riling away at the injustice of it all whilst everyone reading this is just thinking ” that is just the way of the world, suck it up girl!”
And that’s what I am going to do.
I am grateful that our paperwork and checks and balances keep us from a situation where we have to bribe our bureaucrats and officers etc…..at least…not for such little things as business licenses…..
I’m probably revealing how very little I know.
What I know is art, and I’m going to try to keep that my focus.
Deep breathe. Paperwork will be taken care of one step at a time. Keep creating.
I lack inspiration at the moment. My work schedule has shifted…I feel shifted…it’s going to take me some time to figure out how to reorganize my creative life.
In the meantime, since I missed taking part in the local photography club slide show ( a bi-annual community event)…just totally gapped, dropped the ball, forgot it was taking place… I am posting the photos I was going to show at the event here instead.
As always, let me start by saying that I am an instant gratification type of cook. Keep it simple geniuses, remember?
So, as fancy as this might look, it really didn’t take much time to whip up. If it can’t be made in an hour or less,well, then it can’t be made…not in my world anyway.
I’ve been on a “cooking as creative outlet” kick. Who knows when it will abruptly end, but I am riding the wave while I can. This was my first experience with panko breadcrumbs and I think I will definitely be using it again…maybe next time on shrimp!
What you need for the tuna is:
Ahi tuna steaks (thawed or fresh)
Panko breadcrumbs
Oil (preferably not olive oil as it will be exposed to high heat)
Salt & pepper
Simple right?
Okay, timing is everything, so rice needs to get going first.
I used Jasmin rice ( I like how each grain stays separate and it’s wonderfully fragrant) well rinsed and instead of water I used coconut milk. Fill until about one fingers width above the rice. Bring to a boil, stir and then set on simmer until all the liquid has cooked off.
To add to the flavour, on a whim, I threw in two star anise:
Okay. That’s on the stove. It will take about 20 minutes.
(side note: you could forgo the rice and just make a fresh salad instead!)
In the meantime, you can start the soy sauce reduction which will take 15 minutes:
3 tbsp dark soy sauce
1 tsp light soy sauce (optional)
2 tbsp honey
Simmer and stir often. I threw in sesame seeds just for shits and giggles.
Stir! And then remember to come back and stir it again! Or..keep it super low until you can give it your full attention.
Now, the tuna:
Pat the tuna dry with paper towel. Sprinkle with salt and pepper (I’m on a kosher salt kick – love the stuff)
You will only need a few minutes, so make sure your rice is done before you start this adventure.
Fill a pan with an eighth of an inch of oil and heat.
Then dip the salt and peppered tuna in the panko ( I mashed the panko with the bottom end of a small bowl to make it a little finer, but you don’t need to do this).
Then carefully, gently place the steaks in the pan.
For me, this is where it all went to hell. I was not so gentle and oil splashed. I have a pretty ugly if superficial burn on my arm now. So, to spare you this experience, gently place the steaks and don’t freak out if there are some popping noises coming from the pan.
You can see the tuna cooking upwards toward the middle. Let cook for roughly 50 seconds and then flip. If the panko is nicely browned, then you did good! Leave for the same amount of time on the other side and then plate!
Hopefully you remembered to stir the reduction. Drizzle it over the tuna and rice.
I had to keep the reduction warm up until the very end because the honey I used was ridiculously thick, so as soon as it started to cool it was almost like taffy. I could work on the consistency a bit more, but the flavour was delicious!
Yummers. Successful, and all told it took about 35 minutes.
I recently set up a booth at an outdoor art fair in Angwin called “Art in the Clouds”. It was only the second year for the art aspect of the fair and as such I was one of only four art related booths. I at least broke even, but it wasn’t super successful. I had taken part in the fair mostly as a practice run to see if I could do it. In that regard I learned a lot and now have more confidence going in to a next one…I haven’t lined any up yet though.
The way I managed to break even was with the printed cards and a few little trinkets I’d made, like the magnets and a few charms.
I recently discovered the long existing but never discovered by me “shrinky dinks”. I had a variety pack and ended up really liking the matt finish one since it really works well with colour pencil.
This is colour pencil
And this is permanent marker. Note their size.
Place in the oven at 300F
In seconds they start to flex and shrink. Really fun!
In the end they’re super small, about half their original size.
Later I attached small silver jump rings and hung them on ribbon. I ended up selling a few of these charms.
Here’s what the set-up looked like:
A little cluttered. And it was hard to get people to walk in and actually look at the paintings. A little more thought needs to go into the whole thing. Definitely a less patterned table-cloth is in order.
I made a few rings some with ceramics and one with a drawing behind a glass pebble.
mini canvas charms
Card sets
A pretty good turn out
Overall a good experience and I’d like to do a few more of these types of events. If nothing else I got a lot of positive feedback which was rather encouraging!
I had an “Ah ha! Ho ho! Hee hee!” moment just last week as I cruised through the aisles of the local grocery, desperate for a quick meal but not ready to totally compromise on quality. Standing at the meat counter I was eyeing the salmon, debating between the chilean farmed fish for 8.99 per lb and the wild caught at 19.99 per lb. Reason won out and I decided on the affordable since fish is always a hit or miss with the hubby, and then what caught my eye was a nice pile of these suckers at 89 cents each. The guys at the counter are always awesome and ended up throwing in a few extra.
Back at the ranch I had my hubby start-up the grill whilst I prepped the salmon, skin on of course!
Salmon:
On tin foil drizzle liberal amount of extra virgin olive oil and sprinkle with kosher salt.
Lay salmon skin side down.
add salt and pepper on top (to taste)
add slices of lemon on top. Fold tin foil mostly closed.
Once the grill was ready, the salmon went on. Couldn’t tell you exactly how long since we usually determine its done-ness by poking at it. Roughly 10 minutes.
Then on went the oysters which required only a minute or so.
This folks was literally the fastest meal we’d every prepared. And all our weariness from the day was usurped by our excitement over this special treat.
Once the oysters come off the grill, all you need are lime wedges and Tapatio sauce and you are good to go. Be sure, as you crack it open with a sturdy knife, to not spill the delicious juices – you’ll not only burn the crap out of your hands but you’ll also miss out on the added tastiness of the brine.
please try to ignore the purple on my thumb; as an art teacher to kids, I bring my work home with me on my clothes and hands!
Now, my hubby is not a fan of fishy stuff, but he loves this. Surprising indeed! And I have encountered all manner of gloppy, slimy, uncooked, fishy horrors during my stint in Korea, but this is nothing like that. It is pure yumminess all the way and you should try it!
Here’s how the salmon turned out:
And because the tin foil was not all the way closed, steam was allowed to escape and the skin was able to get crispy:
Laying the skin down on oil with salt is key to crispness!
And, because I don’t like to do without greens, here’s the simplest greens prep ever:
Steam a nice bunch of collards, turnip, spinach or mustard greens ( I cheat and buy a cleaned and cut bag with a mix of all of those greens at Trader Joe’s). If you use any of those greens it will take only 5 minutes since they cook up super fast. If you use Kale, expect about 20 minutes. Remember that it shrinks down like crazy, so don’t be afraid to steam what looks like a gargantuan amount.
Remove from water, drizzle a teaspoon of light soy sauce and a half teaspoon of sesame oil on top. Gently mix. Sprinkle sesame seeds on top:
Highly recommended: canned beer. It serves two purposes: 1. a yummy pairing with delicious oysters and 2. as a beer-can trap for awful slugs that keep eating our garden veggies.
Die slugs, die!
It really works! Cut the can in half, fill with about an inch of the beer you can’t finish or has gotten too warm to be refreshing anymore.
Okay, okay we’ve talked about slug death, now on to life! Baby bird life!
The joy of the grill is not just the food but the entertainment we get from the birds that visit our little yard. Right now we have a bunch of hungry blue bird babies and two very tired parents who are continually feeding them. It’s truly remarkable how non-stop it is. Approximately every minute one of the parents lands with some grub to put in their gaping mouths. The babies are making quite a racket with their chirping.
It’s a cut-throat brutal world for the birds. There’s always a threat that another bigger bird will come and drag the babies out for a wee snack. Mom and dad are very watchful and are always suspicious of us. We are always hyper aware of the chirping and when we don’t hear it we fear the worst. But so far, so good.
One wonders how the fattened up babies are going to squeeze out of that hole!
It’s nice to know everyone is well fed.
So try out the oyster thing, it will be well worth it and it’s about the easiest thing you could prepare for a meal.
Folks, you know how I don’t like to spend loads of time doing domestic chores. Cooking falls somewhere in the middle. I groan about having to do it at times when I’m just off work and would rather be vegging or doing something creative. But as it turns out, cooking can also be an amazing creative outlet as well and I try to look at it that way. Recently (actually, in April) one of my fellow bloggers sent out a challenge to the blogosphere to create something out of left-overs, the “Great Leftover Challenge” at http://dannyskitchen.me/. Well, I didn’t answer the call but now I’ve come around so I’ll post this in honour of the competition I did not participate in. My absolute favourite thing to do in the kitchen is work with what I have left over in the fridge and try to come up with something that completely reinvents it. That to me is the most creative and seems to come to me rather more naturally than a brand new dish. Also, if I don’t have to nip off to the grocery store for any filler ingredients, I consider that the biggest success and triumph. Let me share with you my triumph:
This is what I had in the fridge: Pearl Barley from the previous night’s BBQ, a half tomato and 1/3 of a box of quinoa.
So I rummaged through the fridge, mind working through possibilities, and this is what I dragged out:
I set the quinoa to cooking. I’ve seen it prepared other ways, but my way is to rinse the quinoa several times to make sure of no gritty chunks ( I lose some grains in the process since they are so dang tiny), then bring water to a boil and put the quinoa in. When it comes to a second boil, stir and then leave it on low until all the water has evaporated. Pretty much exactly as one would prepare rice (though I’ve seen other methods of rice making as well that go against all my asian roots and makes me cringe).
Then comes the chopping and the grating. I happened to have the veggies that I had, but that in no way should limit you. As long as you have crunchy veggies, this dish will be a success. I happen to like the texture of cucumber and cauliflower in salads and was lucky enough to have them in my fridge at the time.
So here’s the ingredients list, just keep in mind it is infinitely changeable:
pearl barley
quinoa
1/2 tomato
1/3 cauliflower
1/2 cucumber
2 celery sticks
2 carrots medium-sized
1 bell pepper
Sorry folks, I’m kind of a pinch of this and that cook. As you will see later, I’m not much for measuring and I rarely follow recipes. I’d say I had approximately a cup of barley and a cup of quinoa.
My personal preference is to grate the carrot into the salad. Easier to chew and it seems to absorb more of the yummy dressing in this state.
Oh yes! And a wee bit of red onion finely sliced or diced. I took a pic to illustrate how little I use. Too much and it overwhelms the salad and also makes for dragon breath that will haunt you for the rest of the night and maybe into the morning!
Don’t forget that this is a wonderful time to fill your compost. If you do not yet have a compost, get on it! It’s absolutely brilliant. It took me a while to convince my hubby that we needed one. He thought it would just attract wildlife i.e. rats and our yard was too small. But I worked on him and we ended up building a small one. He is now a convert. It makes fabulous soil for our little garden, and it feels lovely not tossing all this organic matter into the landfill.
*Side note, the best compost bucket in the world is not the ones they sell specifically for compost but this plastic OXO brand container. It is marketed as a container for pantry items like cereal, etc. because the lid has a top button that you depress and it seals the container. Well, it absolutely works as a compost bucket for exactly that reason: it seals. No smelly fumes emerging into the kitchen AND it’s easy to clean unlike traditional buckets that have all sorts of inconvenient grooves for stink to settle into.
Okay, back to the salad.
As I mentioned earlier I’m not a measurer and as a result I invariably realize mid-way that I have chosen a vessel too small for what I am creating. Since I am a salad monster, I should have known better and just gone for the largest bowl possible. But for me, starting smaller helps to reign me back a bit. It is always helpful to have a bowl that is slightly too large so that when you get to the dressing it part of the process, you can easily mix without all the ingredients falling out.
Bowl transfer
Last but not least, when all fresh veg are happily sitting in the bowl, toss the cooked quinoa and some raw sunflower seeds (optional) on top. The quinoa is still warm from cooking, but as it mixes in quickly gets cooled by the veg.
And now for the dressing. Remember, keep it simple my geniuses. If you have a favourite salad dressing in the fridge, good for you! Toss it in.
If you like making your own dressing, do so and toss it in.
I am a sour/vinegar fan and so I favour this totally made up recipe of mine, which I will now attempt to share but keep in mind the measurements are approximations. Keep the phrase “to taste” in mind and make adjustments accordingly. My salad was rather large so measurements are also large.
Asian dressing:
1 lemon or lime (I actually prefer lime but had none on hand and dang it I was not going to the store!)
3 tbsp virgin olive oil
1 dash kosher (or any) salt. Celtic sea salt would be awesome!
2 tbsp light soy sauce (all soy sauce is not created equal and come in many flavours. I recommend Pearl River Bridge Superior Light Soy Sauce)
Rice vinegar (to taste) approx 2 tbsp
1 tbsp fish sauce
1 tbsp agave
1 tsp sesame oil
It wouldn’t hurt to sprinkle liberally with sesame seeds as well. I know my Auntie R would approve.
Then mix this whole shebang together and…
voila!
A salad even my hubby can enjoy. For me, the essential ingredients are those that give it a variety of texture: the cauliflower, sunflower seeds and grain. I’ve never used pearl barley before, but it was very nice. In lieu of that, brown rice or spelt would do…any grain you enjoy.
So, I hope you give this a try. It’s super simple (any and all ingredients can be substituted with something similar) and pretty quick so long as you don’t mind a little chopping.
Many posts ago I started on the path of succulent propagation. My biggest experiment was using the “let it sit” method with a few leaves I’d gathered that had fallen from a succulent plant at the garden center – NOT stealing as they would have been considered cast offs and no doubt swept up and tossed.
So, to refresh, the method is to let them lie on a bed of Perlite in filtered light until they push out roots and then begin to form their own little plant. A while ago they put out a few tiny roots, but check it out now! The little plant is starting to form at the base ( you’ll probably need to click on the photo to enlarge it so you can really look closely):
Also, the heads of my Hens and Chicks have robust roots and are more than ready to be planted…if only I had a place to put them…
And, as I may have mentioned before, the art of becoming a succulenteur is really about experimentation. I just made a new observation about one of my succulents. It could almost seem to be a deliberate experiment with two test groups, but in reality it is all just coincidence that I had the same succulent type planted in two very different locations. One is outside in full sun, the other in filtered light. Check out the difference between the two!
The first one is in full light, the second in filtered. Note how in full light and heat they have balled up and tightened. In the filtered light they have opened up and stretched that neat webbing to its max. Both are doing well, but they adjust to their conditions in order to do so. Also, the one in full light popped out a lot of babies ( off shoots) in early spring due to lots of consistent rain…unlike the ones in filtered light which rely on my non-consistent watering patterns!
On the garden front…well, the Bok Choi bolted. This is the third attempt and the third failure. We’ve had really odd changes of temperature. I’m pretty sure the week of scorching heat is what caused them to bolt. But if it weren’t for the heat, I’m sure the pests would have done them in:
Note all the munched leaves.
Our little planter with chard turned into a potty for some nocturnal animal. All the sprouts were dug out and I believe if you look close enough you can even see a turd in the bowl. Boo!
Okay, since we’re on the track of failures at the moment, I may as well tell yo that some of my succulents started looking rather weird in the way they were forming their leaves. Also, I noted aphid-like critters on some of them. It seemed to be spreading, so I uprooted the ones that looked diseased.
Also, because of the funky weather, my living rock succulent’s flowers shriveled up and died without actually blossoming. I thought the whole plant would die, but it seems to be doing okay if you disregard the desiccated flowers at its center.
Onwards to brighter things! The Romain is doing fantastic. We had our first garden salad of the year a few days ago. The roses are in bloom, my Lambs Ear are taking over the entire patch and the bees are loving the flowers that just started blossoming from them. My Lavendula Dilly Dilly ( yes, the actual name of the lavender I planted, of course I chose it for its name!) is getting ready to bloom as well.
Our Purple Iris has run its course
But replacing it is a new kind:
And my established Hens and Chicks are also blooming:
And finally, after three years here, a lovely California Poppy has decided to join our accidental garden!
Annnnd we have a blue bird family in our little bird house. Every time we step into the garden you can hear the little babies chirping from inside, saying “feed me, feed me, feed me!” Our presence in the garden worries the parents who stand around with worms and insects in their beaks flitting to the roof of the house then away again unwilling to reveal to us where their precious babies are. And in accordance the babies fall silent too; until my hubby and I freeze in our actions to the point of shaking with the extended exertion of it until finally the mommy or daddy decide we’re no longer a threat and finally deliver the food to the anxious and voracious babies.
Mommy and…
Daddy!
Also, now that it’s getting hot, we are visited by our friendly neighborhood lizards who love our concrete step leading into the garden.
All in all, we are rather happy with our little backyard. We haven’t invested as much time in it as the previous year, but it is still a delight. Everything seems so alive and so active.
So, despite some failures in the gardening department, on the whole I think it is much more of a success. I’ll leave it at that!
It’s been quite a while, folks, since I last posted something. I was away on a 4 day, 3 night hiking/camping trip with my husband, his sister and her husband ( who only made it the last day as he was recovering from an infection from cat scratches and bites- yikes!) and two other friends.
How to make succinct what was truly epic. I am still trying to readjust to a real bed, a shower and a stove top on-which one can finesse the temperature with high, medium or low and everything in between.
I think I have about a billion photos. One of the perks of being the photographer is that you “have to stop” to take pictures, making me look less like a wimp and more like an artist. But truly, I was compelled to take photos because everything was gorgeous.
We hiked up from headquarters to a mountain ridge, camped there the first night and then took two days hiking to the ocean, and the last day hiking back. We experienced micro climates: warm and dry on the ridge, cold and damp near the ocean. We experienced moments of ” I don’t think I’m going to make it” and moments of ” I am rocking this so very hard-core!”
My one issue was a bum knee that decided to start twinging on the very first day. Lots of weight from our packs and a few badly placed foot plants and I was thinking I’d have to call it quits. It’s amazing how quickly one can go from feeling really fit and in the zone, to decrepid and like an old hobbled granny needing a walker. On the ups I could just hoof it like a pro, on the downs I had to slow down and limp the thing. But on day two I was loaned a hiking stick which made all the difference. As the days wore on, the packs got a little lighter and my knee a little stronger. By the end I felt like I could have gone at least another day…if not for our absolute longing for a shower to feel clean again!
Dehydrated food was our main fare. I was entirely shocked by how yummy some of that stuff is. The only time is was not thrilling was when too much water was added making for a sloppy mess. I dunno, could be that we would have eaten anything given our exhaustion levels at the end of each day.
Our little beer can stove came in handy. My hubby loves it so much he ended up boiling water for everyone in the group more than once. It’s not as efficient as some store-bought stoves, but man does it get the job done in a jiffy!
Here’s me sitting it out while everyone else does the 1 mile hike down to the creek to filter some much needed water:
We needed to fill our water containers about twice a day. Luckily there was many a stream along our hiking route.
This is one of many wild irises growing everywhere. Mostly white and a few purple ones.
And there were even trilliums!
Not quite like the ones in Ontario, Canada where I grew up. The petals are much smaller, but still the signature three leaf, three petal plant.
Check out this watering hole where we rinsed off and got more potable water (upstream of where we cleaned ourselves, of course!). Freezing but glorious!
Banana slug love. Eeew. I live in fear of actually slipping on one of these guys. Ugh.
The falls on our second to last day. At times we felt like we were in the Jurassic period and that a pterodactyl or some such ancient beast would appear to eat us whole.
Amazing Red Woods.
Below is our incredible camp site on the last night. It was like a little faerie glen, surrounded by luscious trees like a protective wall with a little bit of sky peaking through the middle:
As if getting to the last camp site wasn’t enough, a few of us opted to hike the 1.4 miles to the ocean.
Voila!
I was pretty stoked. And do you know what’s by the ocean?
Rocks.
You can see in the above photo that I have already acquired one rock and that was within mere seconds of stepping onto the beach. I’m a pro.
And I am perhaps the only back packer who has ever hiked rocks back out with them. Yes folks, that is exactly what I did. Usually the goal is to consume weight over the course of days and end up with a lighter pack by the last day. Uh uh. Not me. I added rocks to my pack.
I couldn’t help it. It’s a compulsion.
My hubby watched me silently as my gaze wandered from the beautiful ocean waves and sky, to the rocks at my feet. He didn’t even say anything. Okay, maybe he may have uttered, “really?” But then he humoured me and left it at that.
People, I used utmost restraint. That beach was a gold mine of amazing rocks.
I could have stayed there for hours. But that would have been decidedly anti social.
So, I tore myself away after a measly half hour or so.
I got home with this loot:
What made this trip so satisfying was the feeling of achievement upon reaching camp after hours of hiking and getting to throw down that heavy-ass pack. Exhaustion makes eating and sleeping that much more appreciated. And perhaps, it can also explain this conversation between my husband and myself as we linked arms and each bent one knee behind us to stretch ours sore calves:
Hubby: “We’re like a two-legged horse”
Me: “…..”
Hubby: “…only with a lot of differences.”
At which time we cracked up and couldn’t stop laughing for about five minutes as we tried to figure out in what configuration a two-legged horse might remain mobile. This illustrates the state of our brains after a 4 hour hike.
All said and done. This roughing it thing was amazing. I am rearing’ to go again. Next time around, I will know how to pack more efficiently, will know what to bring and what not to bring… and I’ll definitely be leaving room for a few rocks too.
A few days ago I bit the bullet and cleaned up the house. Yes, even used the vacuum. I was, of course, spurred on to this for a reason: guests were coming. That’s why I need a steady stream of guests if I want my house to be spa like at all times.
But now look at it!
My hubby, his sister and her husband and two of their friends and I, are all going on a three-day hiking and camping trip at Big Basin National Park. We’re pretty excited to be camping – even more so because I’m taking time off of work for this adventure!
Well, we both went shopping yesterday with a list of things for our camping trip, and wouldn’t you know, more came home than expected. Not only has this turned out to be expensive, it’s also ridiculous. You would think we were heading into this trip expecting to die of starvation, and the result is an extreme overcompensation. At this rate, the only things we’ll be able to carry is food, forget about a tent or sleeping bag, let alone clothes!
One thing I’m kind of looking forward to is trying out the dehydrated food I got at REI. We are only bringing the beer-can stove so whatever we eat has to be edible with only boiled water added, no simmering or cooking time required. We’ll either be impressed or really disgusted :
On to the “fluffing”. I’m still working on gathering together a bunch of art stuff for this art fair I’m going to be a part of in two weeks. I’ve already dragged out all available work and have been assessing what I’m going to take in terms of originals:
Then there’s the additional fluff required to fill it all out. I’m pretty happy with this:
It happens to be a frame I found at a thrift store (really good quality) which already had a mat board in it with pink trim I thought I’d have to toss, but turns out it goes perfectly with my “Alfred Yawn” print.
I’ve already designed 4 octopus cards that are currently at the printers – I’ll update you on that later. I’m pretty excited about them. And now I’m working on another idea: mini originals magnets:
It’s still in the experimental stage. I’ll draw little pictures and mod podge it to glass stones with a magnet also secured to the back. That way, folks who can’t buy the pricier stuff can still go home with something. What do you think?
And now for the “Oh stuff it!” part of my blog.
Our garden this year has been half-hearted. Not because we don’t care, but because we are in the process of looking for a house to buy and don’t know when we’ll be moving out. As a result, we’ve half planted and half let things go back to nature. One thing we did do was plant Bok Choi, and wouldn’t you know it, the pests are out and loving it! It makes me mad because in the past we’ve had no luck with Bok Choi and I really hoped that this would be the year. Oh stuff it.
But, on the bright side ( literally, on the bright side of the photo ) the romaine lettuce is doing just fine.
For that matter, our accidental garden is doing great as well. Check out my elephant garlic sprouting its flower:
And something unidentified ( in his half hearted haste, he neglected to mark any of the plantings) – we think peas, is growing quite happily:
And that’s the latest on roughing, fluffing and stuffing it!
I’m feeling cranky. You know, the kind of cranky that makes you want to do crazy stuff…like shave off your hair or something. The crankiness is coming from a feeling of lack of moving forward, a lack of creative outlet. Shaving my head would probably be the result of misplaced action and something I’d deeply regret…or maybe not…
Instead, I’m going to channel that frizzy energy into being pro-active. Part of being a creative person is the struggle with not only self-doubt but also with how to get your stuff out there in the world. That is where I’m perched. Ready to show my work and ready to sell some stuff but not sure how.
Today I’m filling out a form for the Angwin “Art in the Clouds” outdoor art show. It doesn’t cost much to enter, it’s only their second year, and the turn out will most likely be small, but I need to exercise some marketing muscle. I need to put myself out there just to see how it feels and get the ball rolling.
It’s coming up fast. That means I need to have stuff to show and small salable items that I stand a chance in hell of moving. The chances of originals being purchased are slim, so I need to head into the world of reprints…without breaking the budget to do so.
Can I do this? It’s coming up really soon : May 20th.
Pawing through the stuff I’ve already done, I found cards I’d had printed last year for Christmas. I have lots of extra I can package into card sets:
Would you buy a set of those? I’m also working on some octopus themed cards for thank yous and birthdays.
But therein lies a slippery slope. Do you make art for art’s sake, or do you make it to sell? Once you worry about your audience, the joy and the freedom of creating can quickly slip away.
I shall be navigating these waters in the next couple of weeks. Wish me well. I will keep you updated.
So last time I wrote about succulents I’d just been to the garden center and picked up a few new wonders of the succulent variety as well as a handful of loose succulent leaves. Well, I laid them out on a bed of perlite and left it outside under filtered light (my covered porch) and waited. It’s been what…two weeks now? Well, I am happy to report that they are now pushing out roots. Check them out!
I’m going to wait a bit longer until it starts to form a new plant, so I will get back to you on that. They still have a lot of juice in them. No watering is required. You know it’s ready to put into the ground when the leaves are desiccated and a new mini plant is formed at the end where the roots are.
I also showed you how you can propagate by just cutting off succulent heads, scabbing them over and putting them directly in soil. Well, I cut too many heads and didn’t have enough planters, so some of the heads I left sitting on the perlite. Well, wouldn’t you know it, they also started to push out roots. These should be placed in soil pronto as the leaves are getting really thin, indicating that it’s using all it’s juice to make those roots and needs water soon.
So that’s the most recent skinny on succulents.
The end of April brought the first BBQ of the year for us. Very exciting. Nice to have the longer days and the warmer evenings.
For our inaugural BBQ we grilled burgers. Not to be forgotten, sweet red onions drizzled with olive oil and sprinkled with kosher salt.
Look at its transition to absolute tastiness heaven:
Add to that my mother in-law’s home-made pizza…and we were so very good to go!
The accidental garden is doing well. Those petunias just keep on flowering!
And my hubby planted a lot of seeds that have been happily germinating on the window sills in our apartment. Look at this happy sprout greeting the vegetation outside our window:
Soon they’ll be ready for the outdoors.
Unfortunately pests have discovered my Bok Choi that was so happily flourishing in our planter boxes. I haven’t the heart to upload a photo. Have been experimenting with sprinkling cayenne pepper on and around them. So far no evidence that this has helped in any way. Does someone out there have advice for me? We think it might be earwigs getting to them. Booooo! Hisss!
That’s the latest. Will upload photos of recent artwork soon.
I first caught on to the idea of a tasting chocolate from a friend. She whipped up a rich, creamy, chocolate with a spread-type consistency using cocoa and coconut oil and a few other ingredients. I watched her eat it by the spoonful.
Flash forward to my friend Shannon, during her pregnancy and afterwards, turning to her Justin’s brand nut butter with maple syrup, or chocolate in a little squeeze tube like a ketchup packet for a protein rich treat.
I gave that stuff a try and loved it, but felt guilty about the packaging waste, and was somewhat stunned by the ticket price $1.79 on average per little packet. I guess you pay for the convenience of it. It was nice to just reach in my bag, pull one out and discreetly ingest it ( I have two kids under five years…having something for yourself means hiding and discreetly ingesting, ok!).
Eating nut butter or even chocolate in this way is revolutionary for me. Not sure why it has taken me so long to really try it out myself. I’ve had ample examples from friends over the years. I remember watching my high school buddy eating peanut butter by the spoonful, but back then I just thought it was odd. I was locked into the idea that nut butters needed to be on something, not stand alone. It’s taken me this long to get on the band wagon!
I’ve been really craving these small portions of nut butter during the day, but couldn’t bring myself to buy the packs, for the reasons listed above. I decided, I can make this myself by combining the tasting chocolate idea with the nut butter protein pack.
Last post I wrote about my DIY chocolate nut butter. This is just a little different, a little more indulgent, with a few additional ingredients and smoother consistency.
Here is what you will need (keep in mind you can make this as indulgent as you want with the ingredients you choose. Choose a Dutch chocolate for superior cocoa flavor, but pay the additional cost, etc.):
1 baby food sized container with lid
1 heaping tsp organic cocoa powder
1 tsp coconut oil
3 heaping teaspoons creamy, non sweetened nut butter. I used sunflower seed butter (Trader Joe’s now carries a sunflower seed butter that is un-sweetened)
1 tsp maple syrup (you can use honey instead)
Optional ingredients: 1/4 tsp maca powder, 1/4 tsp vanilla extract, or cinnamon powder to taste.
All of this is to taste. The approximate ratio for nut butter to everything else is 3:1. However, if your nut butter is a more thick/dry consistency (almond butter can be this way) you may want to ad more coconut oil, a tsp at a time.
Combine nut butter, cocoa powder, and maple syrup and mix thoroughly. I like to ad a pinch of maca powder too but this is optional. Then add coconut oil, one tsp at a time to make it the consistency you want.
I haven’t tried it yet, but I imagine a bit of vanilla extract would be nice, or a pinch of cinnamon. But that would be hypothesis on my part and not field tested. If you try it, let me know!
Once mixed it should be a nice creamy, slightly thick consistency that sticks to your spoon. Enjoy one spoon (or two) at a time. I like to pop the container, along with a spoon into my bag and pull it out when I need just little pick me up.
Ok. Here I am again, posting about cooking. Let me put in a quick disclaimer: I am not a chef. I am a self taught dabbler, a mother of two and wife of one (no polygamy here). I had no interest in food until, in art school, I discovered that I needed to cook, or die. Thus began my foray into cuisine, first by frantically phoning my mom to ask basic cooking questions, and then, starting to use my gut.
If you are a details person, you like to follow instructions to a tee, measure out everything exactly, this is not the post for you, stop reading immediately and find another recipe.
If you are a person who, like me, tends to scan recipes, compile the fundamentals in your mind basket, and then go-to with wild abandon, substituting with rough equivalents where ingredients are lacking, then this might be for you, read on.
A dear friend of mine recently tried my curry from scratch and asked if I could give her my recipe. I had to answer “no”. Not because it is any great secret, but because I really haven’t the foggiest when it comes to the exact ingredients I use when making my basic masala paste from which my curries emerge. I realized that this has got to change. I really do need to lay it out once and for all. My husband is a huge fan of my curries so I make it quite regularly, however, they always turn out a little different.
Can I also preface this with…I am an ignoramus when it comes to Indian cuisine. I do not know the specifics about the different curries nor their names. I am a novice in the world of Indian spices, yet they delight and tantalize me. They have an amazing power and fragrance and in a world of less is more, the opposite is actually true of these incredible spices, just add more, more, more! It took me a while to realize that I needed to not hold back with the amount of spices I put in. My measly amounts of spices were pathetic. Now, I happily purchase bulk spices in their seed form. You can buy the pre-ground and make life easier, but I believe much of the deliciousness comes from freshly grinding the spices as needed.
So, saying that, if you are anything like me, you already want to throw in the towel. I always get overwhelmed by the prerequisites to a recipe “oh, I need that tool?” “oh, I have to get those spices?””Gaw, I’ll just eat ramen”
Hear me out. What you need is a coffee grinder if you are using the spice seeds. If you have pre-ground, give that grinder no second thought. ( most of us have coffee grinders. I now possess my own “spices” coffee grinder after one too many coffee tasting of cumin. However, coffee with a hint of cardamom is delicious!). It is also helpful to have either an immersion blender or food processors (food processors, I hear they are useful. I haven’t got one).
What you need for spices seems like a long list. It is. But, if you get hooked like I did, you are going to be using them for a long time. Heck, you probably have a few already:
cumin seeds
paprika
garam masala
cardamom (whole) or inner cardamom seeds
coriander seeds
black pepper corns
turmeric (I use the powder)
mustard seeds
clove
fenugreek seeds
If you don’t have all of those, that’s ok, it’s still going to taste delicious.
Other ingredients:
2 med onions
sea salt
5 to 6 cloves of garlic
a thumbs length of garlic (roughly two tablespoons when chopped)
a can of diced tomatoes or several large tomatoes diced.
ghee…or butter…or coconut oil.
Here we go, step by step with pictures!
Get out a pan. ( If you are using powder, skip this and the next step) I love my cast iron skillets. I despise non-stick. The first will (apparently) leave trace amounts of iron in your food- good for those of us always low on iron and pregnant ladies. The latter, will leave trace amounts of mystery chemicals, especially if it’s been scratched or roughed up. A good compromise: a stainless steel pan. With pan on medium heat toss on a tablespoon of each of the following: cumin seeds, coriander seeds, inner cardamom seeds*, mustard seeds, fenugreek seeds and roughly twenty cloves.Toast them in the pan. Toast until fragrant (roughly 30 seconds?) If they start to smoke, you’re done! Take the pan off the heat. This happens relatively quickly, so do not walk away. Use your expert tossing skills to shimmy those seeds around the pan as they heat.* On closer examination of this photo I realized I had no cardamom on the pan. Further sleuthing revealed that the spice lady at the shop had neglected to even sell me any. Oops. I can attest to the fact that this recipe is delish sans cardamom).
2. Pour toasted seeds into a grinder and grind until fine and fragrant.
3. Chop the garlic, ginger and onions roughly and set aside in either separate ( if you like to feel like those chefs on TV with pinch bowls) or a single bowl. It is not necessary to spend time on this as it will all be blended once cooked.
4. Begin heating a decent sized pot. It’s going to hold all of your masala, so make sure it’s not a small pot. I’d say a medium to large one. In the warm pot, add 2 tablespoons ghee (or whatever oil you’ve chosen). I like to use ghee…it makes it feel more authentic, though I can’t honestly say it is any different from butter. Coconut oil adds a little bit of flavor. In my estimation, if you are going to use coconut oil, this is the type of dish to use it in, the flavor lends itself well to curries. Sprinkle in some salt too…this is a great time to incorporate some salty goodness. Now toss in the ground spice. If this is the first time the spice has touched a pan, aka if you bought it pre-ground, I recommend putting it in first, before the oil and salt and letting it warm and “toast” briefly before adding the other stuff. It’s all about releasing the aroma and flavor!
5. Once the ghee has melted (it happens fast) toss in the onions, garlic and ginger. Stir well on high heat, then lower to a simmer.
Now make a cup of tea (preferably a spiced chai) and hold your horses while you wait for the onions to cook down. You want them to be transparent. Don’t rush this stage. If you don’t let the onions caramelize you are wasting some great natural sweetness. This could take at least 10 minutes. Breathe.
6. As you wait, or in your own good time, gather together the following spices, all approximately a tablespoon …except for the cayenne: that is “to taste”. (I have some incredible Birds Eye Pepper cayenne that is HOT. I used only a quarter teaspoon): Black pepper (preferably freshly ground), turmeric (this is a root, so I buy it in powder form), garam masala ( also a proprietary blend of spices, so comes in powder form) and cayenne.
Go ahead and add those spices to the pot. Stir well to incorporate.
By now the whole thing should be thickening up and gluing itself together. You will also start to worry that it’s drying out and about to burn. If the onions are still not transparent, then add a bit of water, just enough to keep it from burning. Do this periodically until those onions are soft. Then cook until dry and about to burn. Now’s the time to…
7. throw in the diced tomatoes. Fresh is best but I did not have any, so canned it was (if you really want to go the health nut way, you only use fresh, because there’s good research that shows that canned tomatoes are pretty bad for you – the acid in them leeches the plastic lining out. Yes, even if it’s BPA free lining, it’s still a synthetic lining of some kind. But if, like me, you’ve obsessed, stressed and ultimately surrendered to theses realities, you will weigh the good against the bad and just go ahead and use it anyway…if sparingly).
Stir. Now watch as that tomato and its juices helps to de-glaze the pan. Now you’re lookin’ at an almost finished masala paste. You just need to cook that down for a bit. I’d say roughly 15 minutes of simmering with the lid off.
8. When you’ve cooked it down a decent amount (it should look like a thick tomato sauce) turn of the heat and let cool.
9. If you are anxious like me, sometimes, or in a time bind, you’re gonna want to blend that up right away. I advise not to. Do you like being burned by scalding hot masala paste? I didn’t think so. Hopefully, you’ve waited at least 20 minutes. Now, go ahead and blend that masala smooth using your immersion blender or whatever other fancy tool you might have for doing this. You can now use this masala paste to immediately make a massive vat of curry. Or, like me, you might choose to divide it and sock some away in the freezer for a future meal. This is how I divided mine:
2/3 in a jar to be used the next day on a curry for four adults and two kids. The last third in a ziplock to be frozen. It will expand to make enough curry for my family of 4.
That’s it. That’s all. I hope you could follow that relatively well. Just in case not, I have handily combined the instructions without the pics and needless commentary below!
Cooking Instructions:
1 With pan on medium heat toss on a tablespoon of each of the following: cumen seeds, coriander seeds, inner cardamom seeds*, mustard seeds, fennugreek seeds and roughly twenty cloves. Toast them in the pan. Toast until fragrant (roughly 30 seconds) If they start to smoke, you’re done! Take the pan off the heat.
2. Grind the toasted seeds and set aside.
3. Chop the garlic, ginger and onions roughly and set aside in either separate or a single bowl.
4. Begin heating a large pot. In the warm pot, add 2 tablespoons ghee (or whatever oil you’ve chosen). Add a teaspoon of salt. Add in the ground spices. Stir.
5. Toss in the onions, garlic and ginger. Stir well on high heat, then lower to a simmer.
6. Gather together a teaspoon each of the following spices ( cayenne to taste): black pepper, turmeric, garam masala, cayenne. Add to pot and stir well to incorporate.
7. When onion mixture is well caramelized and transparent, add in one large can of diced tomato, stir well. Set on simmer until cooked down to consistency of a thick tomato sauce. Approximately 20 minutes.
8. Blend cooled masala into a paste. Use immediately or store in zip lock bags in freezer. Makes enough for roughly two meals (for up to 4 adults per meal).
Thanks for checking this out. If you are curious about how I expand this into a curry, check out my next blog post.
Ahh. This poor wallowing blog. It’s a sad state of affairs, I know, when I have no creative endeavor to blog about.
So, I will seek out the creative in my everyday, because being a mom is a creativity-on-the-fly kind of a proposition.
In recent years I’ve actually turned to cooking as a creative/relaxing-ish process. I’m in the kitchen a lot anyway, and I can’t not cook, sooo …might as well enjoy it. I approach it much like I do my painting and drawing: I do not ever use a recipe, I do use references and then piece it together, I do it all on the fly and often from random things I find in my fridge and cupboards. The less planned out, the more satisfying (my high school art teacher will be clutching his heart at this point; what, no pre sketches?!).
So, because I don’t have any methodical method to this madness, it sometimes takes me a bit to figure out the trick to something. I have to accidentally hit on it several times before the correlation between certain ingredients, time, application etc. spark recognition in me. Then, out of that comes a dish I can mostly replicate…but never exactly.
The recent discovery, people, is salt brining.
How many times have I made…or more often had chicken, or pork, that looks absolutely delicious, but when I bite into it, I am appalled by its lack of flavour?
The answer is: many. Many times. Too many times.
The problem is not even that it isn’t salted (that’s another issue I have…you HAVE to salt meat), it’s that it wasn’t salted properly.
When I bite into meat, I don’t want flavour just on the outside layer, I want it all the way through.
That’s simple, you say, just marinate the damn thing for 24 hours. Oh, you bet, that is definitely the way.
Did I mention I am now a mom of two under three? Did I mention that I am not a planner? Quite frankly, getting frozen meat out of the freezer with enough time allotted to thaw is a challenge for me most of the time. So, yes, if I manage to think days ahead, I can thaw my meat and soak it in a 24 hour marinade and it’s golden.
BBUUUUUT for all you last minute chicas and hombres out there, there is an easier way. And, even if you still want to put a 12 hour marinade on a choice piece of meat, this method I am about to tell you about is STILL an awesome precursor to that and will only make your meat of choice that much yummier.
Here’s the secret: A 30 minute salt brine.
Yeah. Look it up. I am not making this up. It’s out there.
( I know, salt is the new poison…however, I am betting that the salt content ultimately is less and definitely not more than the salt you would automatically get in a pre-prepared chicken from the grocery store.You are the one adding the salt, so you have full control of amounts. For all of you salt enthusiasts, this is for you. For those on a strict no salt diet, I am truly sorry.)
Take your thawed meat: chicken thighs, pork loin, skirt steak, whatever: place in a bowl that is deep enough so that when you fill it with water, the meat is fully immersed. Dump in roughly (I am not a measurer) 2 teaspoons of your salt of choice ( I use sea salt), then fill with water, stir, and then place your meat in it and let it sit, covered, in the fridge, for a minimum of 30 minutes (note: you don’t have to do it in that order, I often have the meat in first, then I sprinkle the salt all over and then add water then gently move the meat around so the salty water fills every nook and cranny). For chicken, especially drum sticks, 30 minutes is plenty.( You can prep your other dishes while you wait. Heck, you can be distracted by your toddler pooping on the floor and by the time you’ve cleaned that mess up, the chicken is ready.) If it’s something like a pork loin, or a thick roast of some sort, you can leave it for several hours or overnight. But you’d be amazed how just 30 minutes can be enough in a pinch.
Then when you are ready to get cookin’, pour out that water, dab your meat dry with paper towel and then season how you would normally season it. Cook it. Gaw, it will change your life.
Oh, wait! If you are going to slow cook that bad boy, don’t pour out that water, use it in the crock pot. When you’ve finished cooking that meat in the crock pot, don’t pour out the cooking juice, use it to cook rice or other grains in it – too f*&in’ good.
That’s it, my epiphany. Since I started prepping my meat that way, my hubby has only had good things to say…as well as my toddler and baby who gobble it all up.
Cheers. Happy cooking/creating.
Tee hee , we gobbled it up so fast I had no time to take a picture of it just after it was cooked. Here are the cold left overs.
In addition:
I just discovered you can salt brine brussel sprouts. Oh yes, I did. My kid chose brussel sprouts as we meandered through the produce section of the grocery store. She thought they were cute because they looked like mini cabbages. I knew this was do or die…I had to make it tasty so that she’d want them again and again. So, same idea, salt brined those puppies, then cooked em up with garlic, ginger and tamari making sure to really brown them on each side in the pan before deglazing with a bit of rice vinegar and water. Also sprinkled it with sesame seeds and a drizzle of sesame oil for fragrance. The verdict: my kid loved them. I even got an “if I have to eat brussel sprouts, this is the way I want to eat them” from the hubs. High praise, high praise.